Exam - Unconventional Project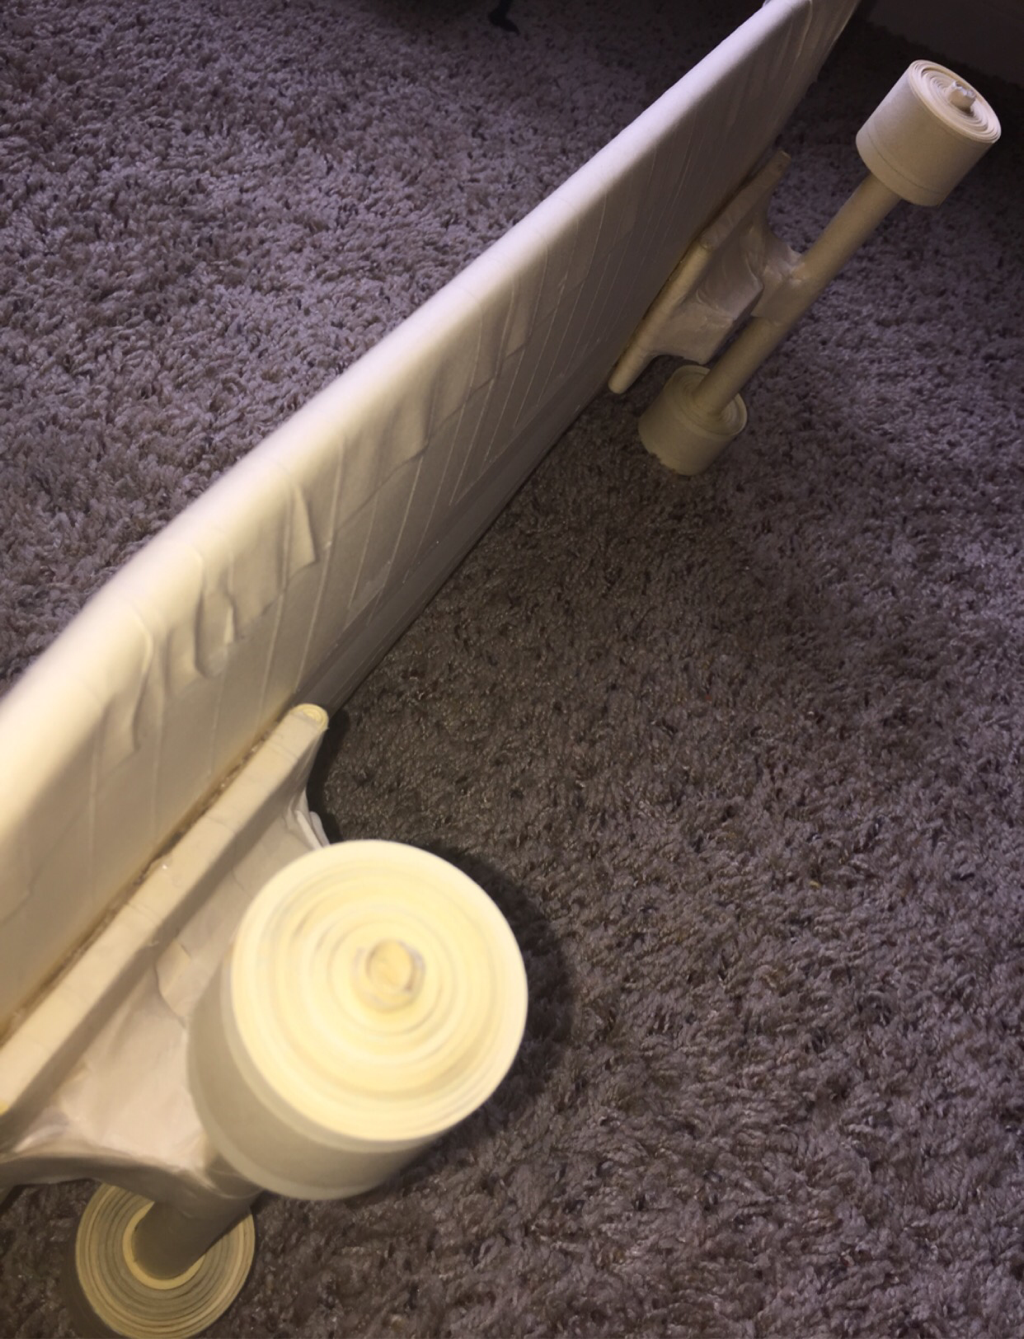 The unconventional challenge was my most successful project!! It looks exactly like a real skateboard. It took me about 4 and a half hours to make and it's literally only paper and masking tape. It's my favorite thing I've made because it's something that expresses who I am. I finished it in time. (it was my first time finishing in time) The only downside is that you can't actually ride or stand on it haha Masking Tape (Shoe)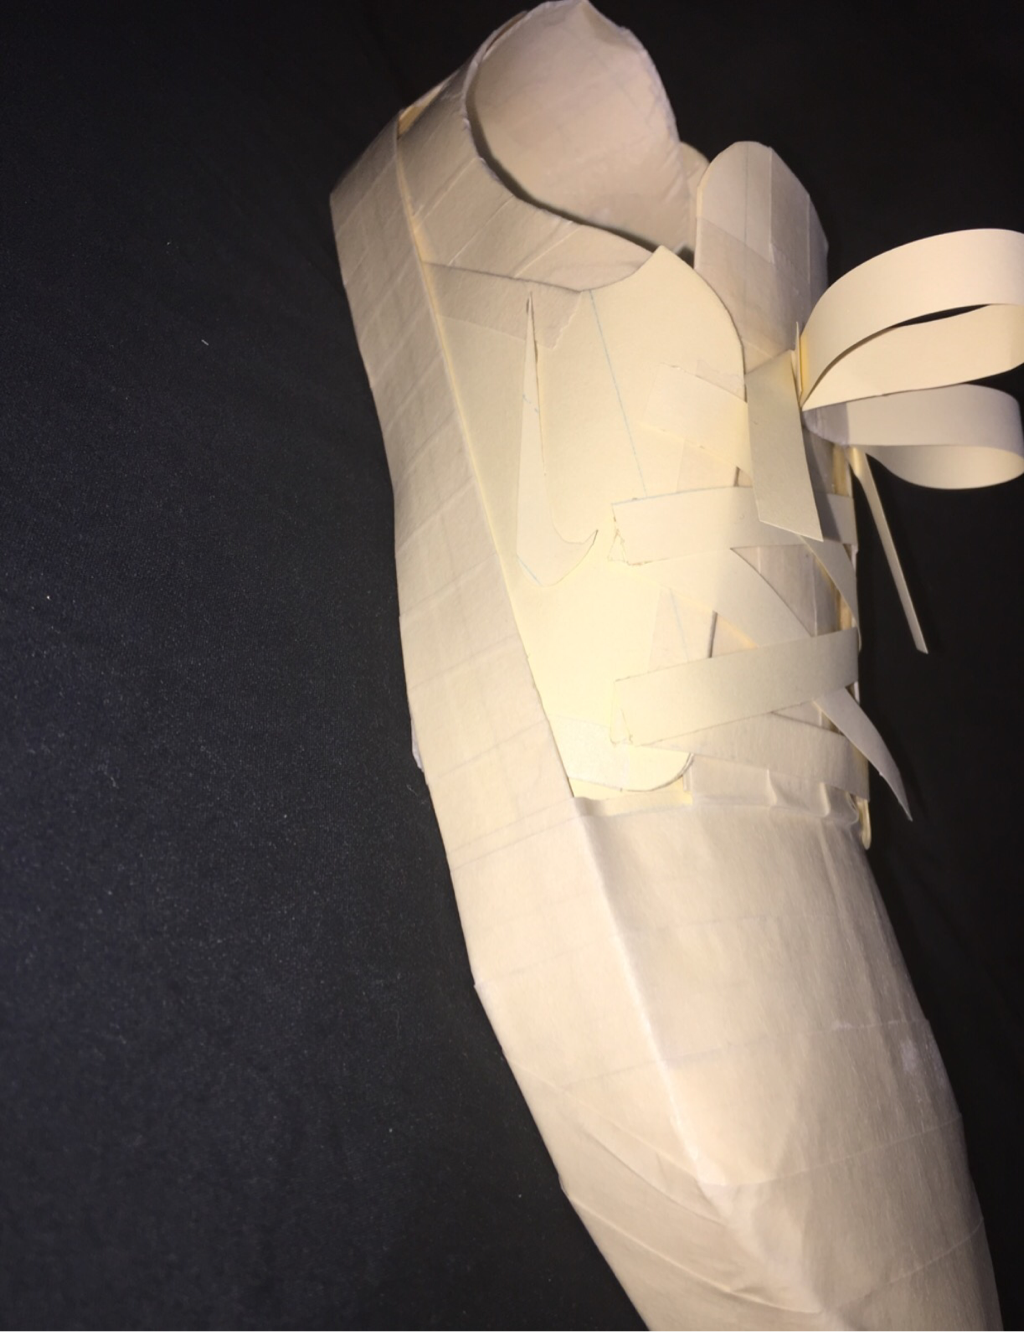 My favorite material that I worked with was paper, it was easy to use. I like it because if you mess up a piece you can just get a new one and it's so thin and light that you could turn it into anything. I got used to it very quick and it was just natural for me. The only thing that sucks if that it takes so much time and you have to be percice to turn it into what you actually want.  The hardest part of the entire class is deffienitly weebly!! Having to post everything you do and explain in detail isn't hard but it's very very boring haha. The app is very hard and confusing to use, also I never kept up with anything I made so it made it extra hard for me to post the things I made. Next time I could just do the blog post as I go along with the different projects that was I'm always staying up to date, and I should start keeping up with my work. Required Questions: In this sculpture class, I used a lot of clay tools...you can actually use anything as a tool if you know what you're doing. The tools helped my to shape and form the clay into whatever I wanted...score and slip helped a bunch when I wanted to connect to different pieces of clay together.My knowledge on tools and art has changed so much since the beginning of the year, I used to always say that art can by anything and that I wanted to try different forms of art. Now I know that you can also use just about anything to help you crate your art into whatever you want. All you have to do is be creative :)
0 Comments
Brian Storm Page 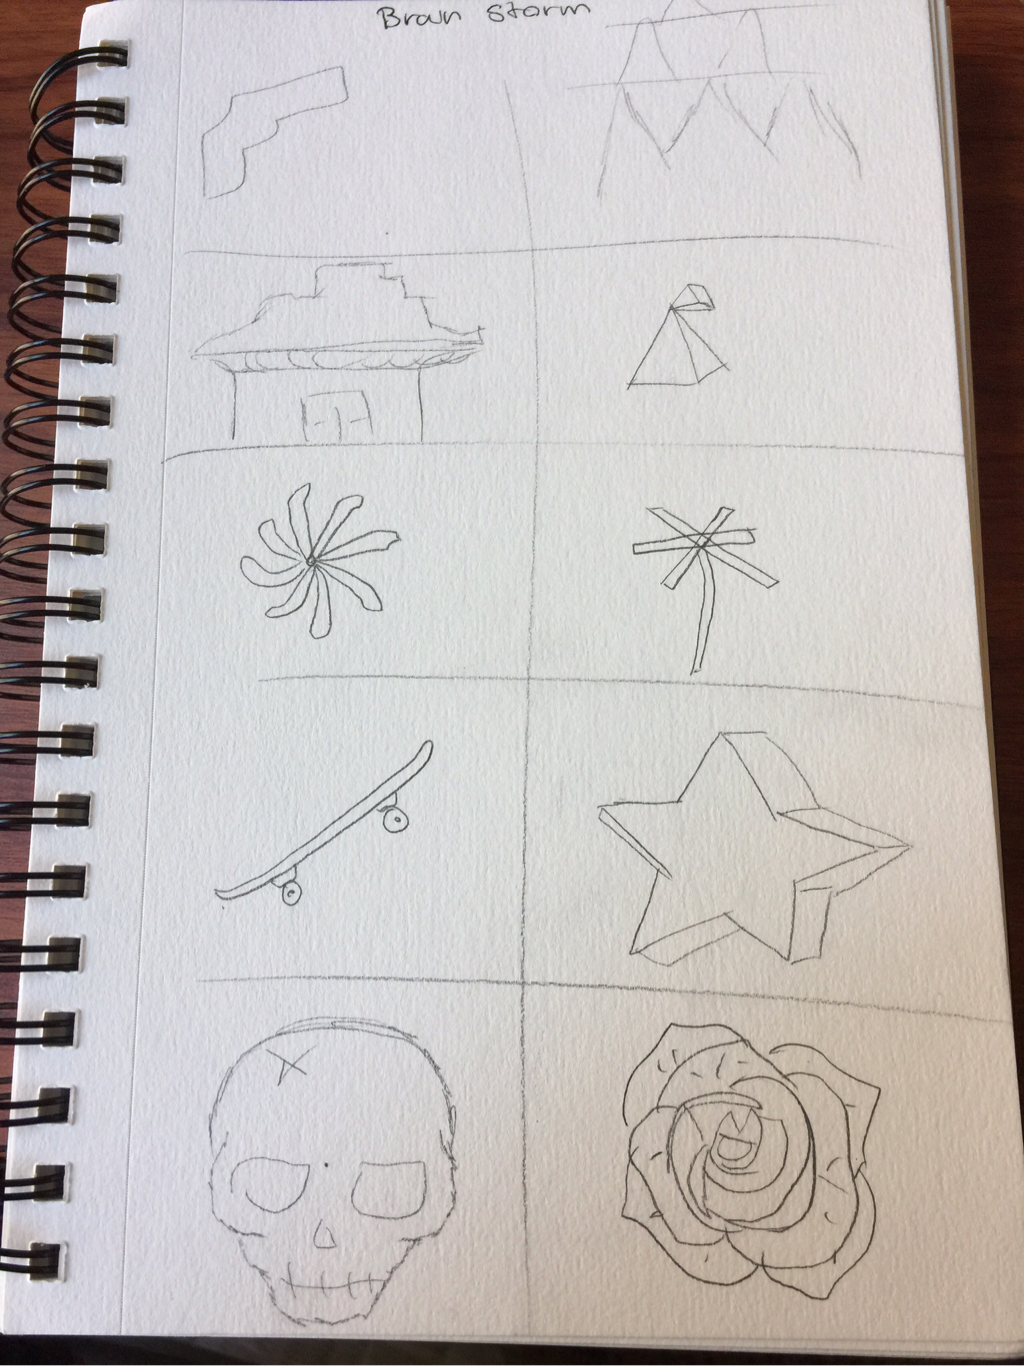 One Page Sketch 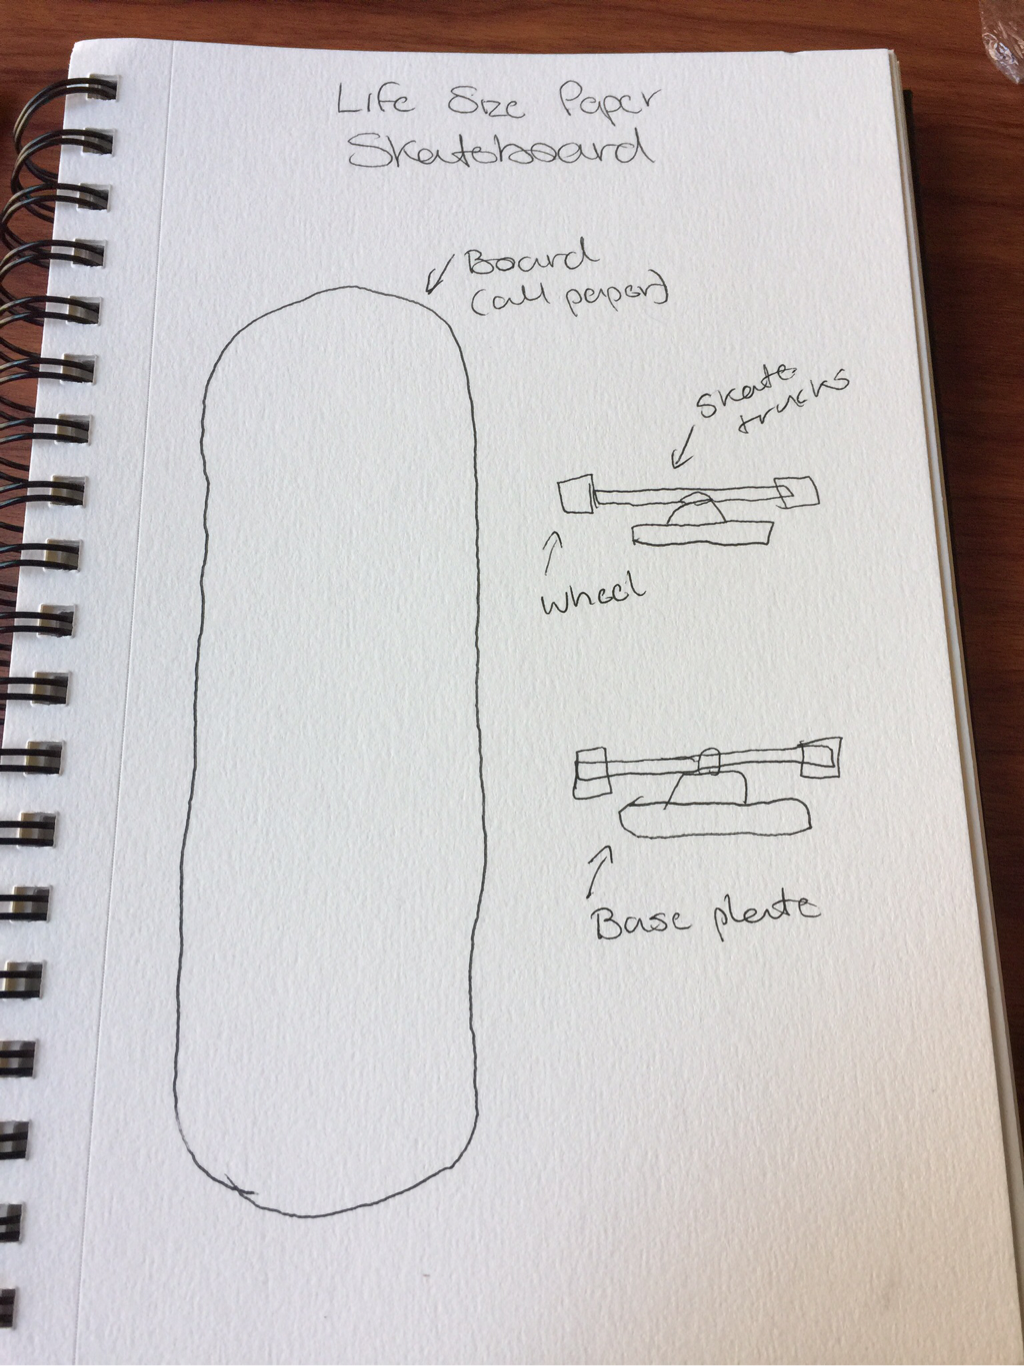 Finished Piece 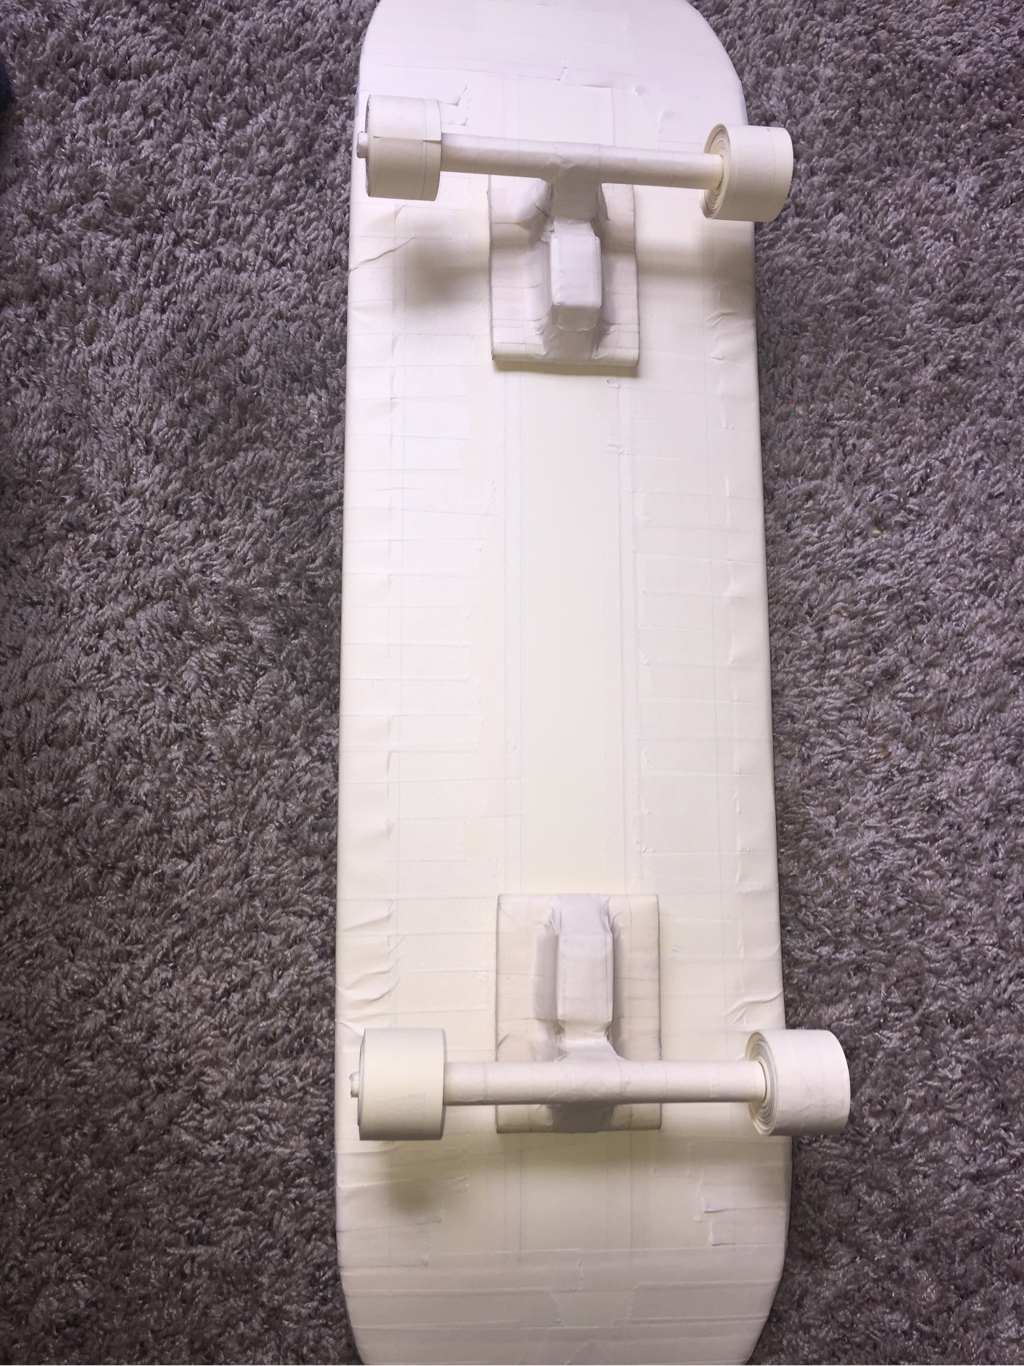 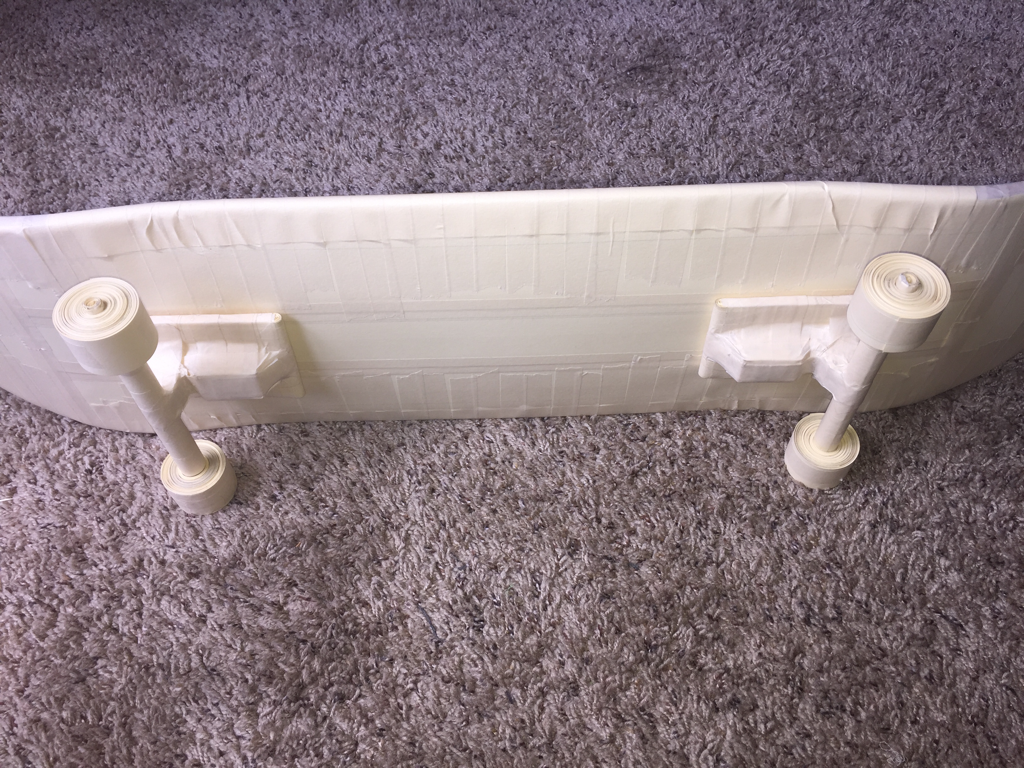 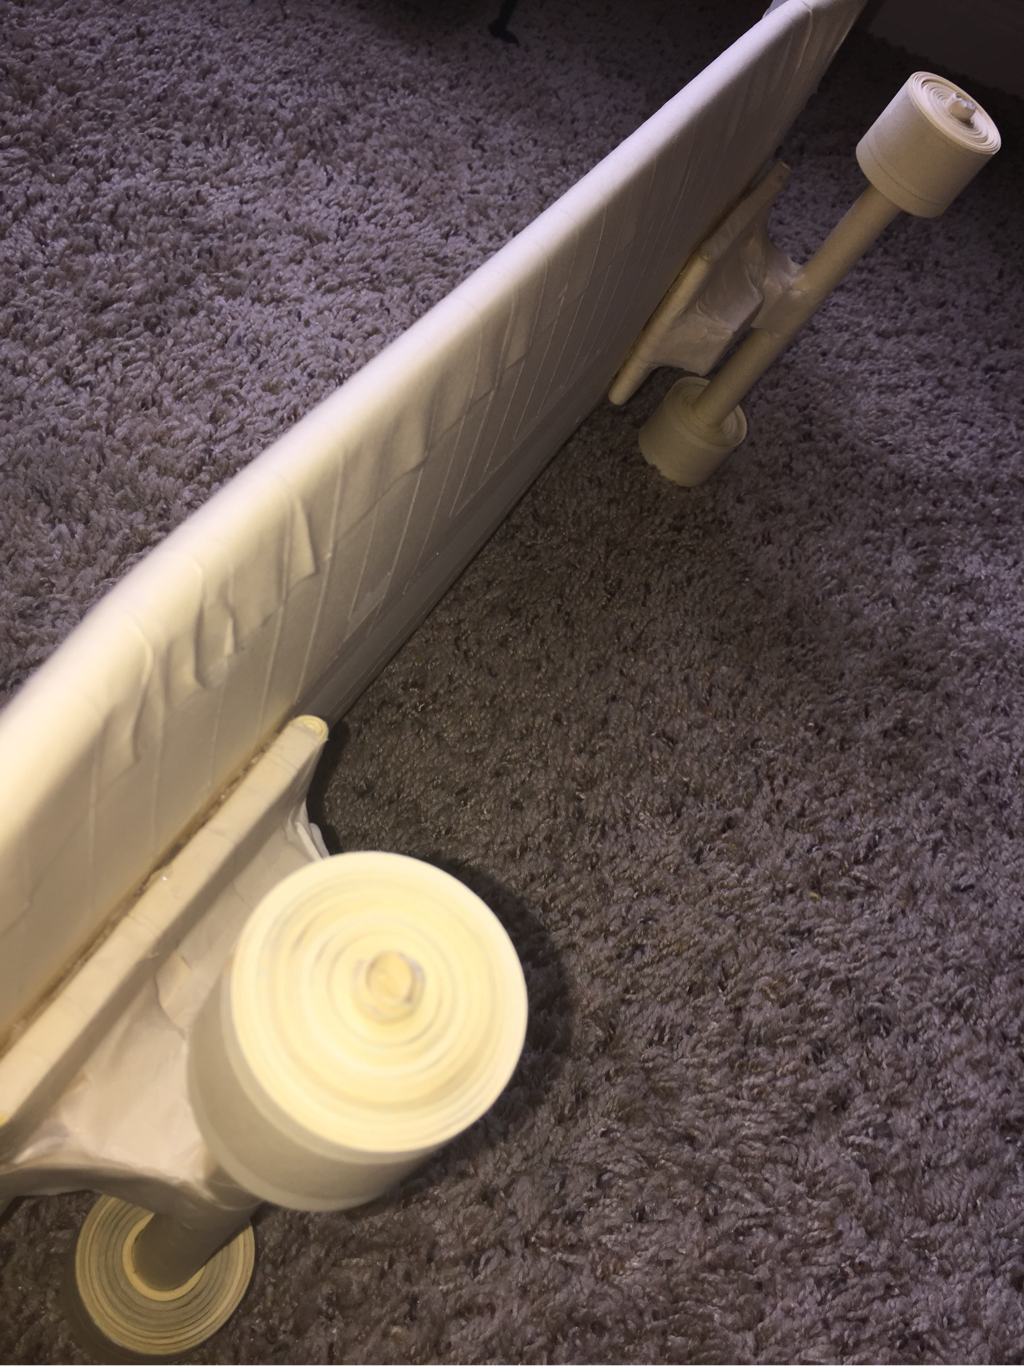 The material I had to use were long strips of yellow lined paper. I decided to make a life size skateboard made of just paper, masking tape, and tin foil, I chose to make this because I personally love skateboarding and there's almost nowhere I'd go without my skateboard and it seemed so obvious to make something that basically represents who I am, I wanted people to see this and think "Oh wow, that looks like something Antonio would make". The material was difficult to work this mostly because I spent about 4-7 hours (no joke) trying to get the actual shape of a skateboard, it was especially hard trying to get it to hold its shape on its own. I believe my piece is successful because it really is the size of a real skateboard, the trucks looks almost identical to the real ones that I used to make it. It holds together on its own...the only downside is, i can't skate it for real hahaha
To make this shoe, first I traced the bottom of my shoe onto two pieces of paper, then I carefully cut out the tracing (this would be the bottom of the shoe). Then I took four long strips of lined paper, cut both of them into about one inch in height then I taped them together (this would be the soul of the shoe). I set the paper upwards against the bottom of the shoe and taped the sides together, I did this until I covered the whole area of the shoe. After that, I unlaced the shoe and traced the sides of it onto another piece of paper, I cut out four of the same tracings and taped those together awell to make sure it would be sturdy enough to hold up on its own. I did the same thing around all the sides of the shoe, once I was finished I pieced all sides together and taped them. After that I placed it into the shoe and taped it to the sides of the shoe. Then I cut 10 pices of long paper into the thickness of a regular shoe lace and taped them side ways over the tongue of the shoe as shoelaces... Finally I cut two more shoe laces out and folded them into little hoops and two sides sticking out and it turned out like this... 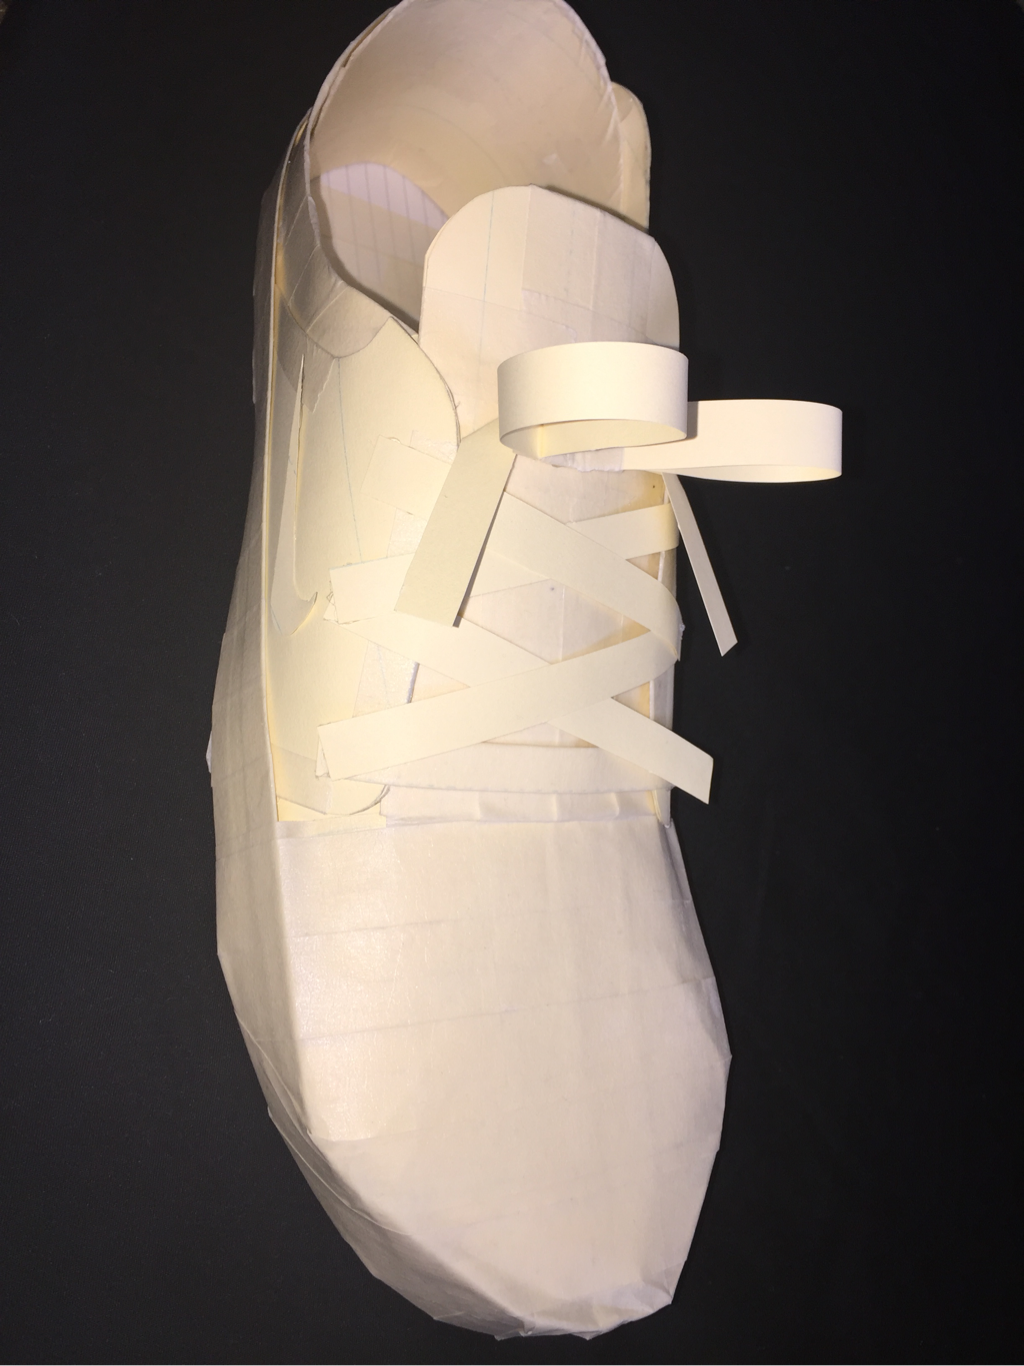 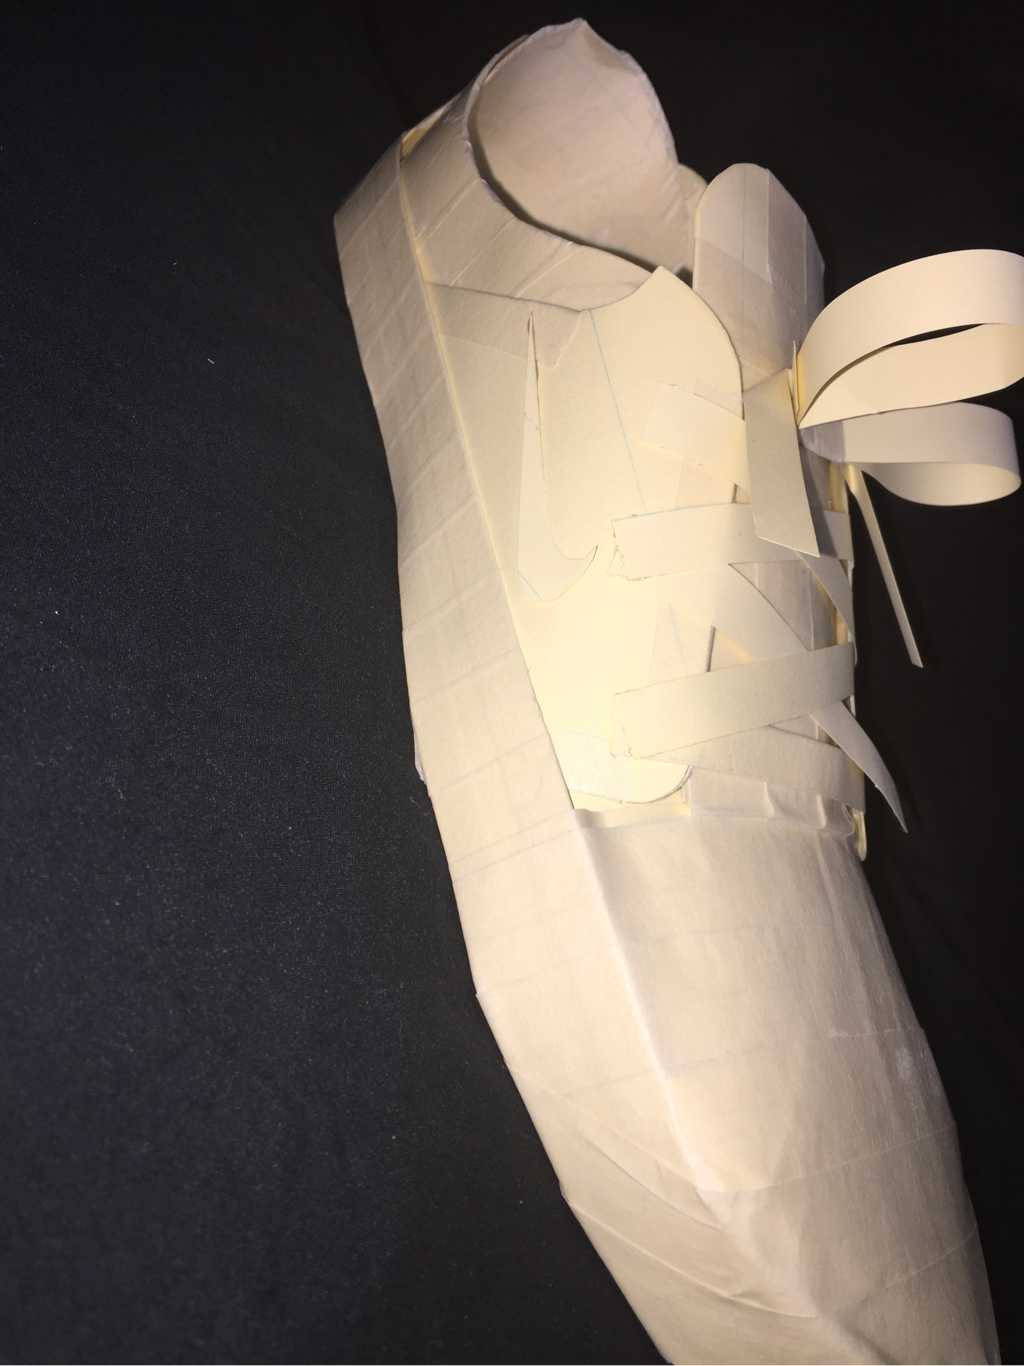 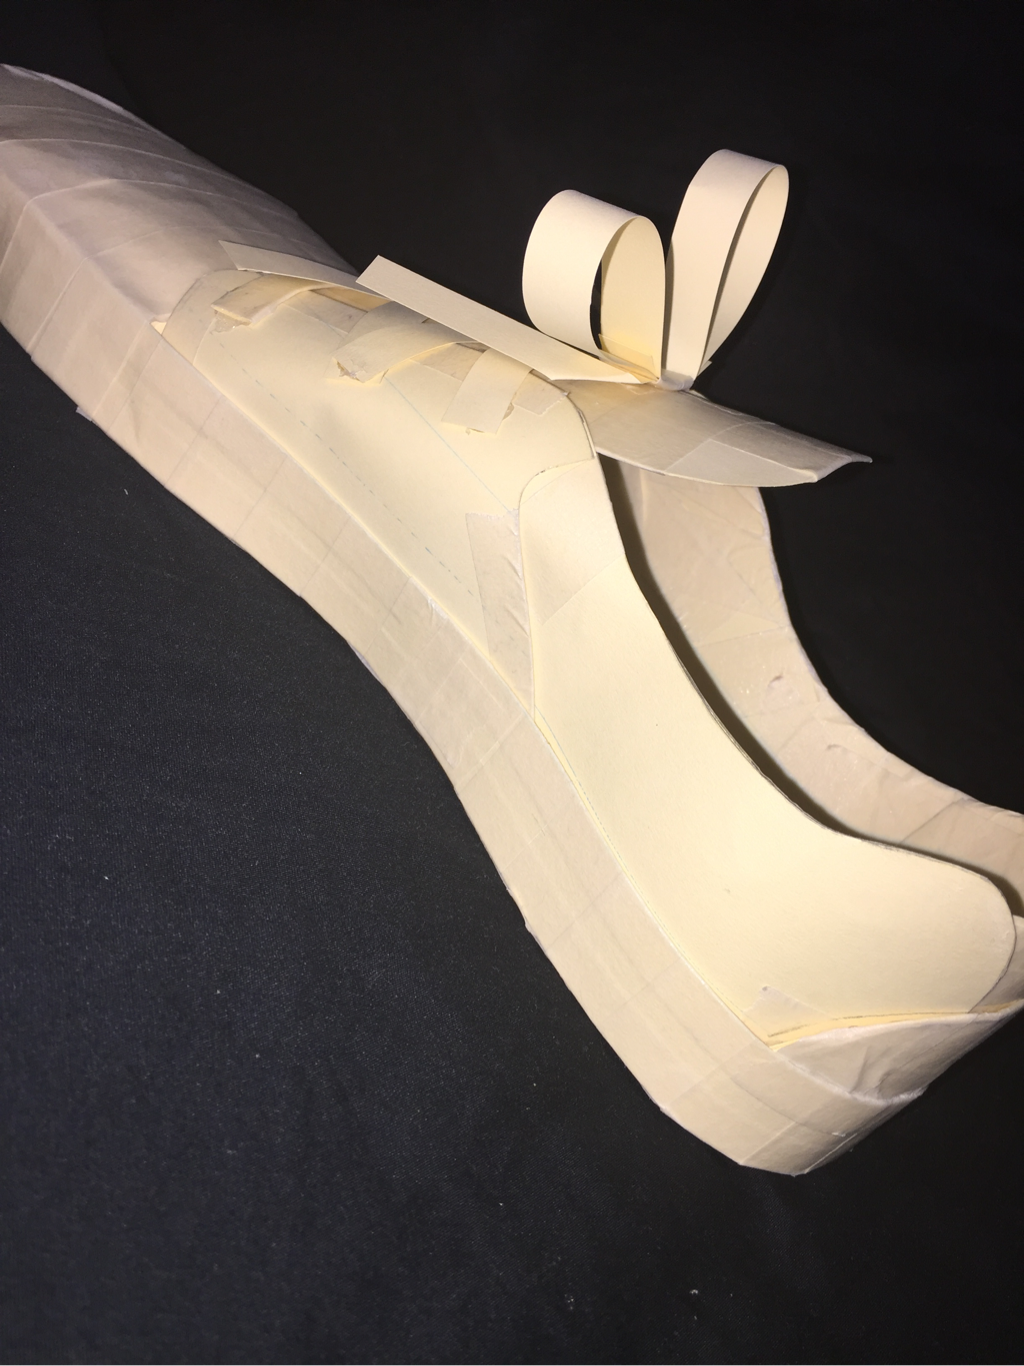 I found this shoe project to be successful because it actually looks identical to the original shoe, plus I can put it on and wear it like a real shoe. If I could change anything, it would be the entire shoe, I'd perfer to make a high top shoe next time because the back of the shoe is harder to fold into the shape that I needed, with high tops I wouldn't have that problem. I found that the only unsuccessful part of the shoe is the front, it was the hardest to form and make it look like the original shoe.
My inspired artist is Hsu Tung Han. He uses wood to sculpt figures of people that seem to be dissolving into pixels.  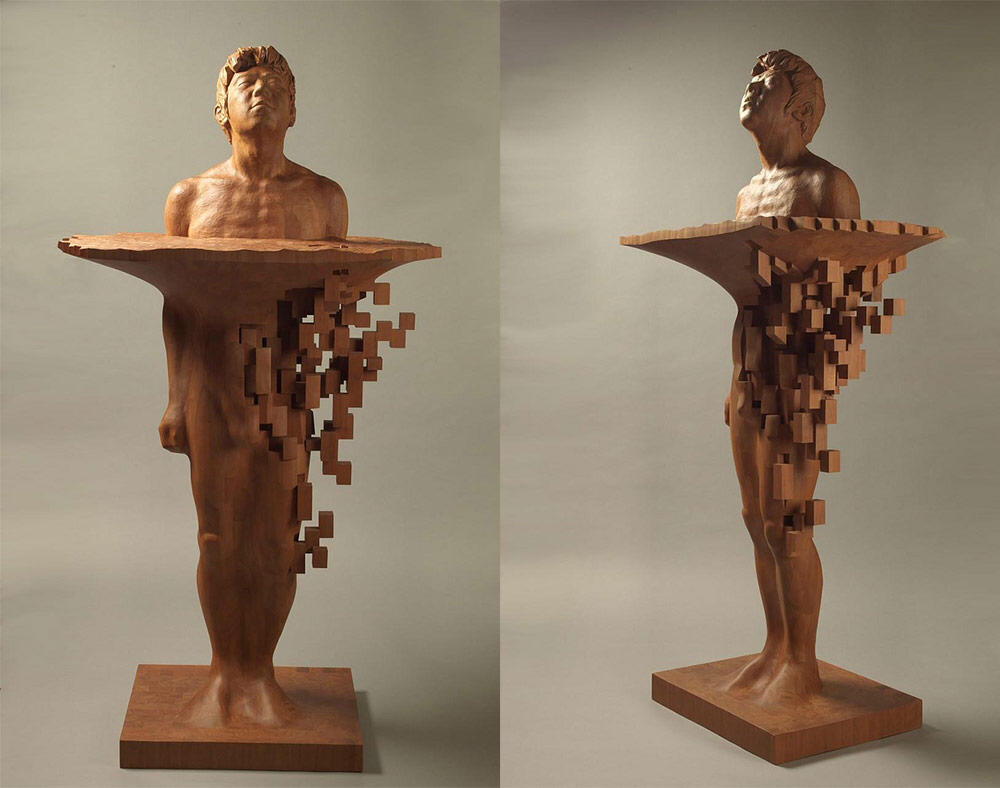 Han's work has a sort of Syfy look, that's what inspiring to me, I love to build and construct different pieces together to make a new figure, I like knowing how the pieces fit together in order to hold its new shape...I guess what draws me in is the fact that you can't stop looking, it's almost like watching a movie...it leaves you wondering how in the world could someone make something so complicated yet simple. Looking at his work almost leaves me mezmorized, it's almost like it leaves a message behind, and like a song has a message to the listener, the scruplures have a message to the viewer. I don't believe their is just one soacific message left behind and there may not even be a message at all but what I get from these sculptures is that everyone has their own imperfections, but everyone is also perfect in their own way. To me it's almost like it also signifys death and how nobody can escape the brutal truth that one day we all have to die, the first picture seems to be a man begging for another chance while he dissolves into a bunch of pixels wich again...signifys death or sort of moving on. Here is a Han's site with more of his work https://m.flickr.com/#/photos/hsutunghan/
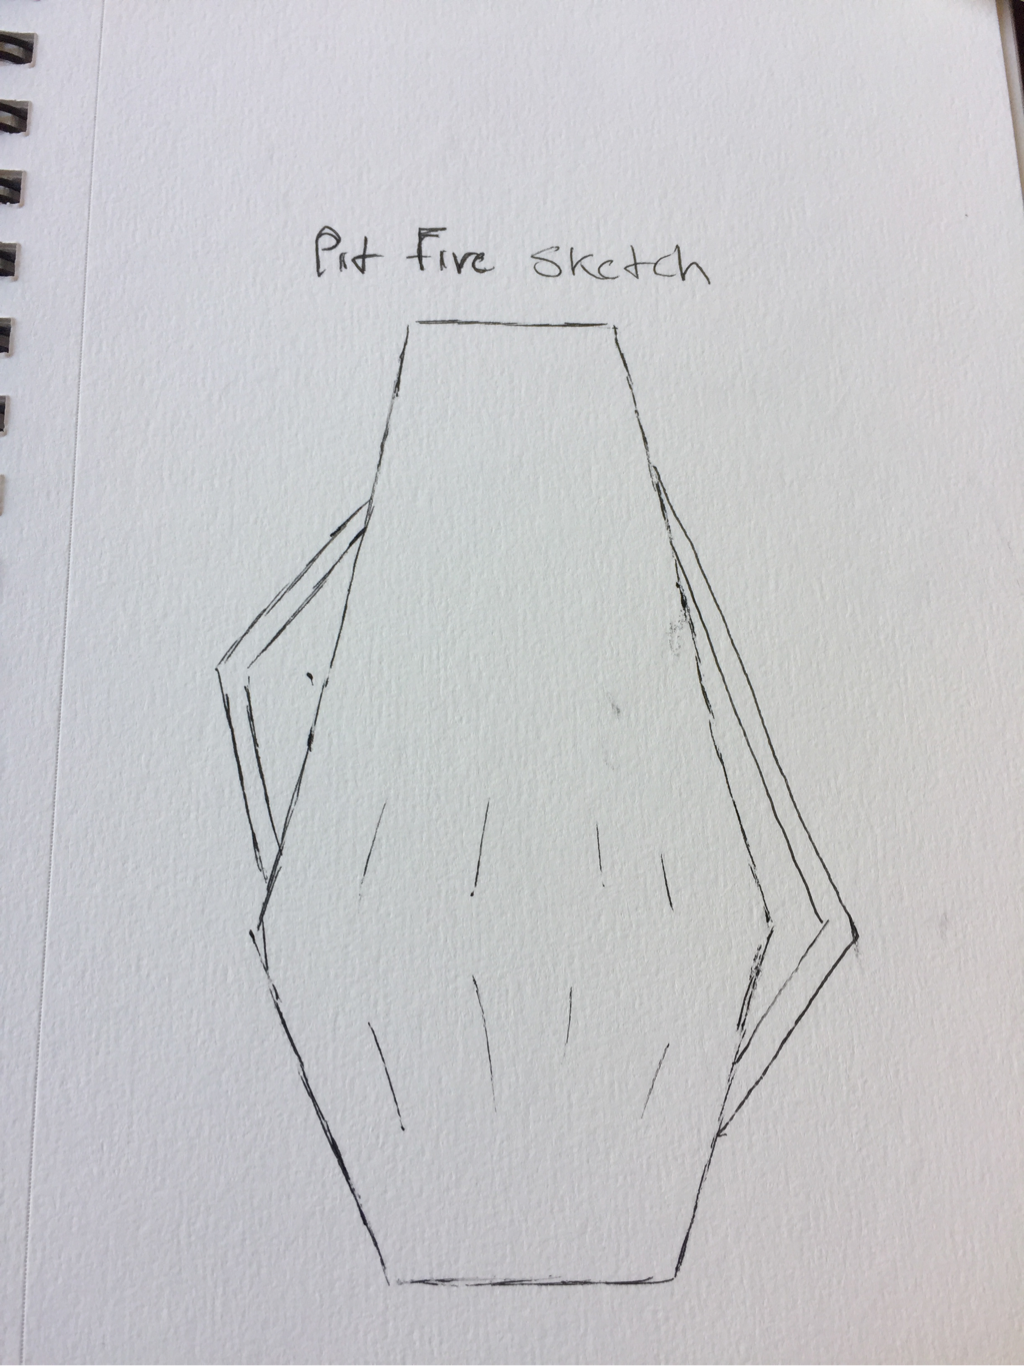
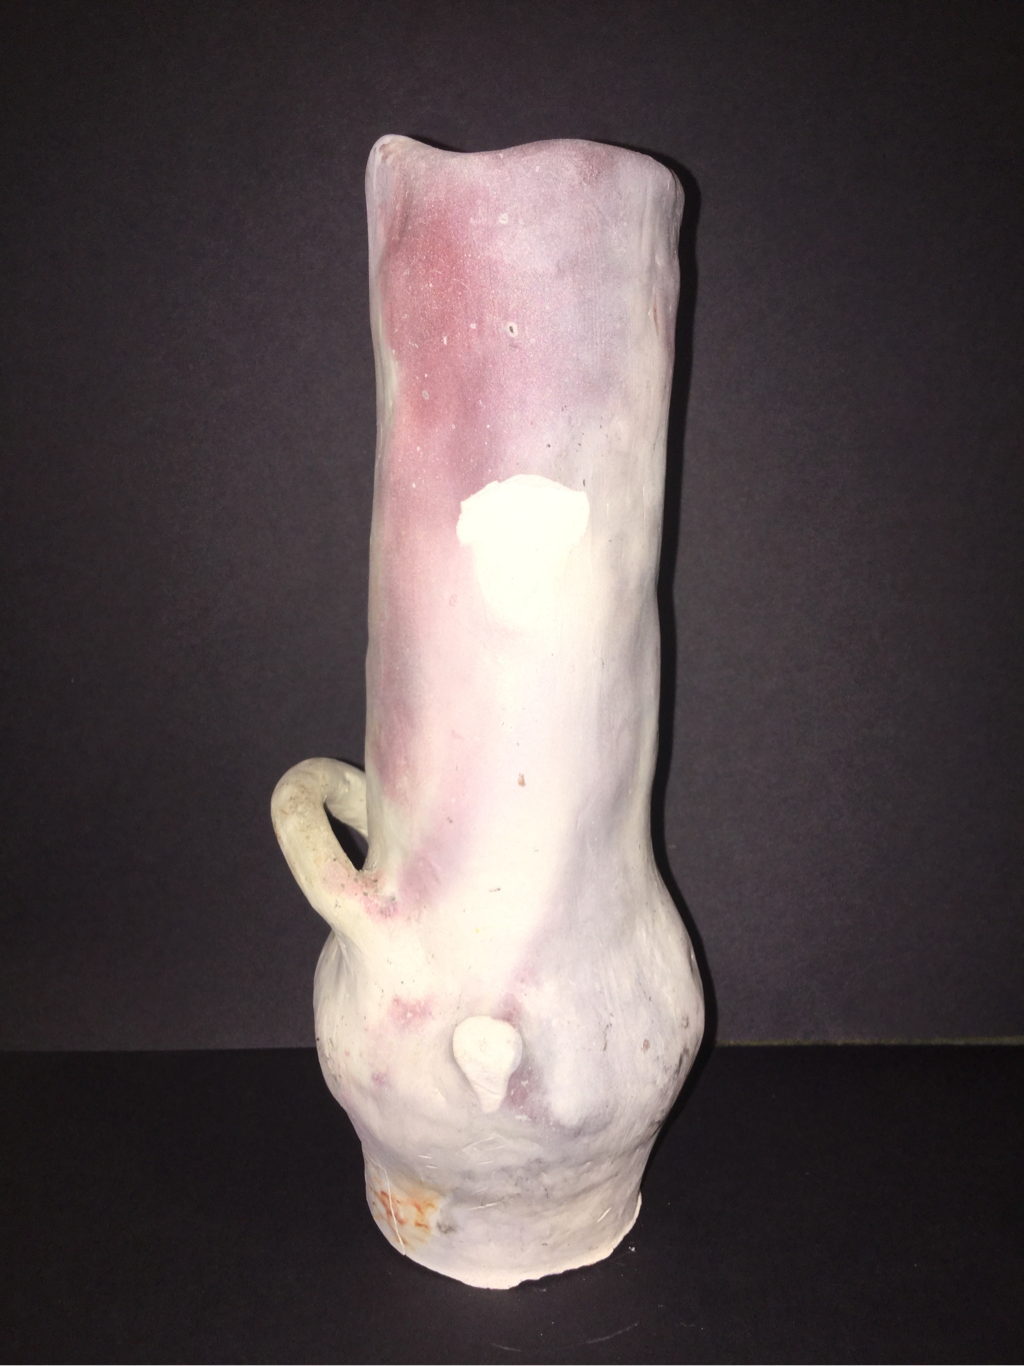  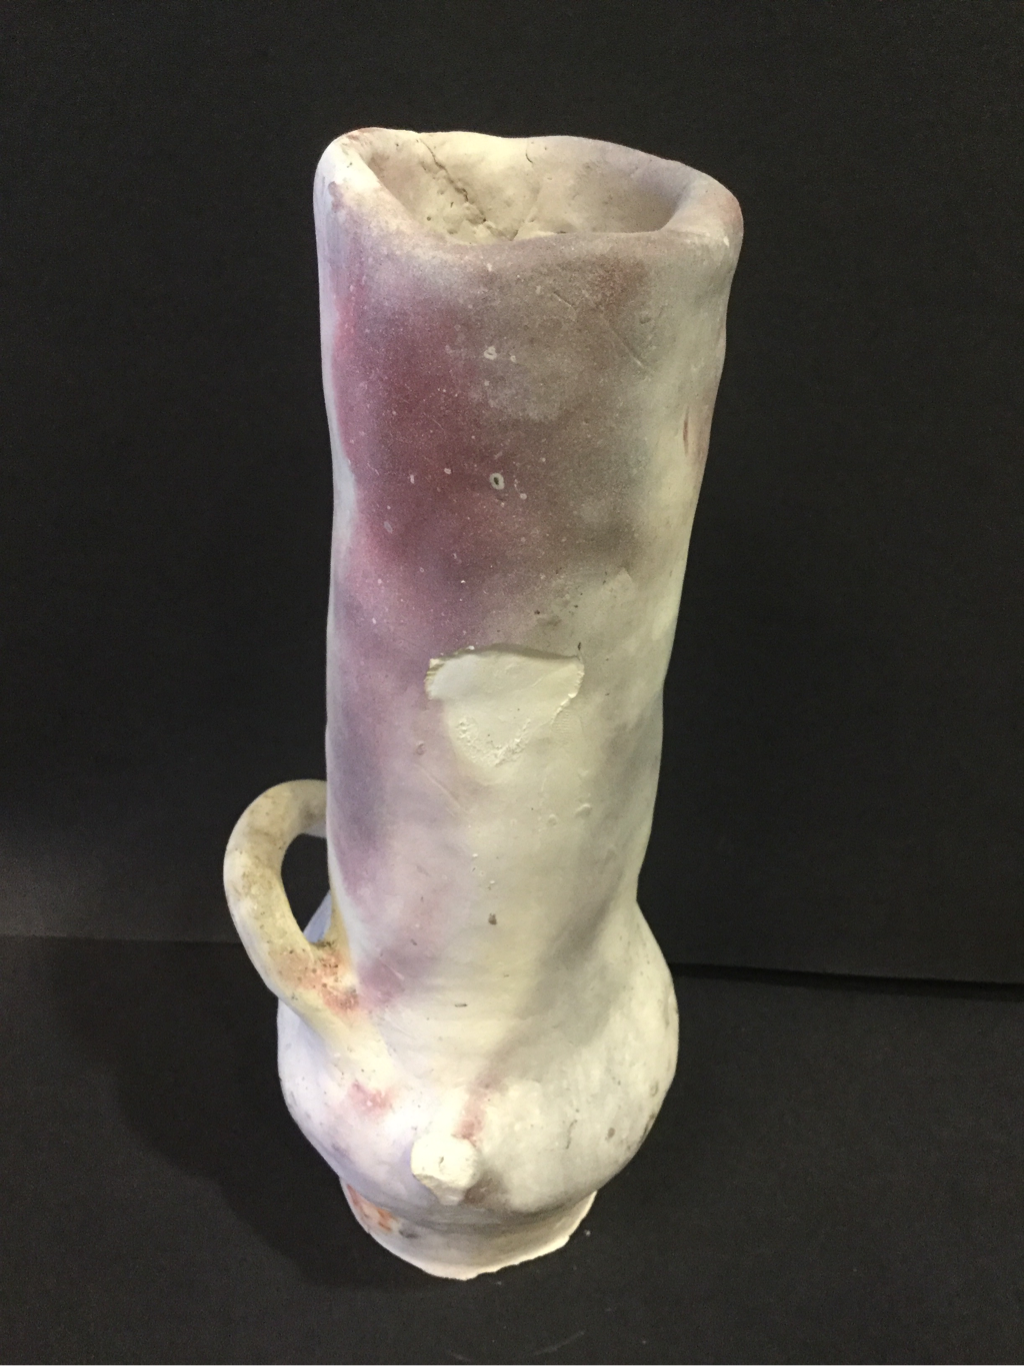 The process for making a Pit Fire piece is.. First, you have to sketch your idea of what kind of piece you want to make. Then you wanna grab a handful of clay and mash it together (wet it first). After that you want to build your piece from the bottom up, take some clay and roll it into a long noodle and place it on top of your pice and smooth it out. Once you've finished, you can take a spoon to smooth out your piece, and you can finally put it in the Pit Fire 🤘🤘🔥 Although my piece didn't turn out to be what I originally wanted, I still think it was a success because it looked similar and I had to improvise and it just happened to work out...if I could go back and change something, it would definitely be the handles, there were originally three but two of them broke in the Pit Fire so.... yeah haha
|
 RSS Feed
